Javascript Warehouse
By: J Stewart10-11-2024
Home Page
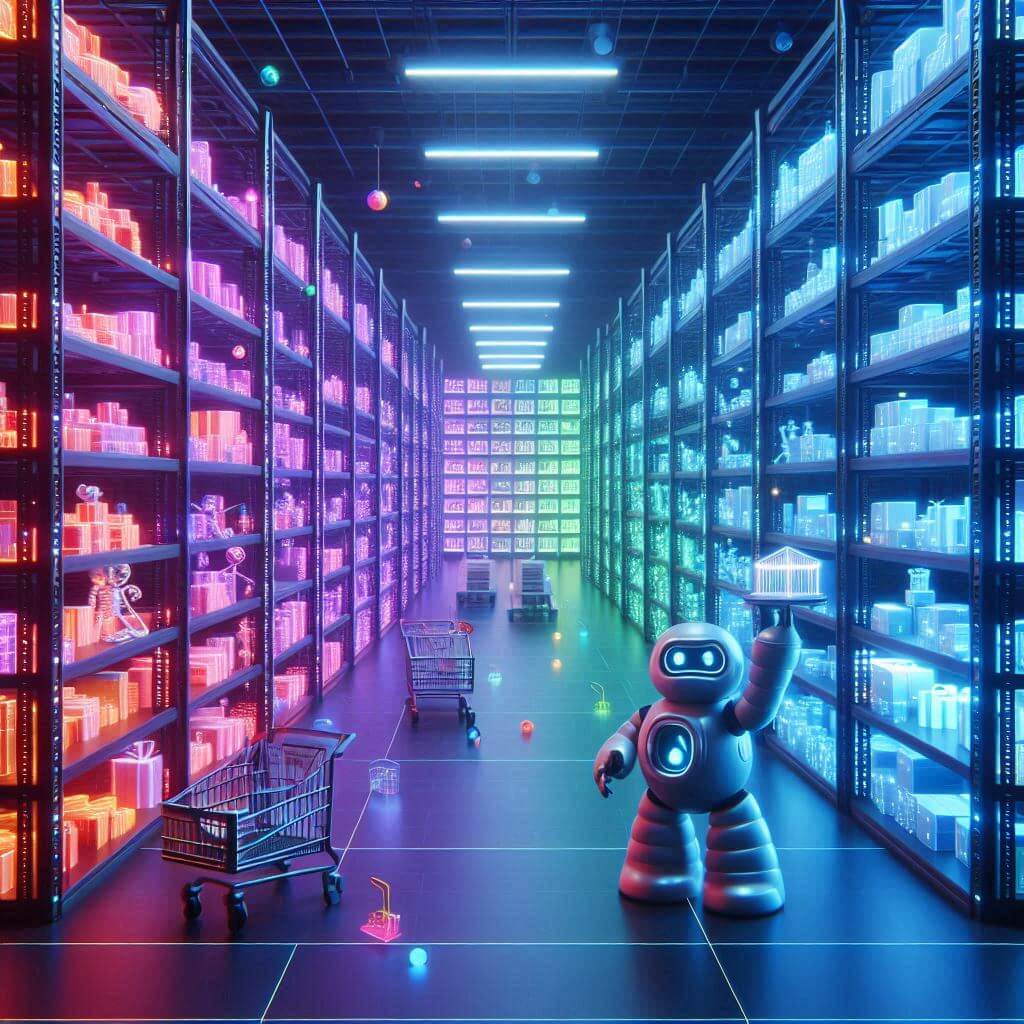
Table of Contents
Here is the Javascript Warehouse!
3d Warehouse Map
Five months ago, I embarked on a new journey working at a distribution center. Initially, I was completely lost—every aisle and shelf felt like a maze. The manager, a seasoned veteran of the facility, seemed to have an encyclopedic memory of every item’s location. After spending an exasperating 45 minutes searching for a single part, I quickly realized I needed a map to navigate this new territory. That’s when I decided to leverage my skills in JavaScript.
I had heard of Three.js and its impressive capabilities, which immediately intrigued me. One of the features I appreciate about it is that it allows me to run projects directly in the browser, locally. Plus, by encapsulating my code in a single HTML file, transferring it between systems is a breeze.
My job is relatively straightforward. I use a PC to access our legacy database and have installed Visual Studio Code, with both Edge and Chrome at my disposal. However, I wanted to add a technical touch to this non-technical role.
Thus, I set out to create a 3D map of our warehouse.
I began by designing a basic floor layout with gridlines indicating the X and Z coordinates, along with shelves placed throughout the space. Utilizing sliders from the dat.gui JavaScript library, I was able to customize and adjust the layout dynamically. This initial framework allowed me to establish a general overview of the warehouse, which I then refined with finer details for improved accuracy and usability.
Creating A Digital Warehouse
Three.js is a versatile JavaScript library and application programming interface (API) designed for creating and displaying animated 3D graphics in web browsers using WebGL. The library’s source code is openly available on GitHub, allowing developers to explore and contribute to its functionality.
For inspiration, you can find a wide array of examples on the official website at Threejs.org. This powerful library enables the creation of interactive 3D web pages, portfolio sites, and much more.
The layout of the page consists of four distinct divs. The first div provides information on how to navigate the site and locate parts effectively. The second div features a search bar that allows users to enter a part number; once entered, the corresponding shelf containing that part will be highlighted automatically. The third div displays the contents of each shelf, listing the parts identified by their unique company numbers, which range from 4 to 6 digits in length.
In our physical warehouse, parts are organized by function or brand, and each part is assigned a distinct company number for easy identification. I will leverage these company numbers to streamline the process of locating and retrieving parts within the system.
Code Is On Github
Check out the code for this project on GitHub!
Import Scripts
I utilized six JavaScript scripts in my project, each serving a specific purpose to enhance functionality:
1. **Three.js**: The core library for creating and displaying 3D graphics.
2. **OrbitControls**: This script allows for intuitive camera controls, enabling users to orbit around the 3D scene.
3. **FontLoader**: Used for loading custom fonts to enhance text representation in the 3D environment.
4. **TextGeometry**: This enables the creation of 3D text geometry from the loaded fonts.
5. **dat.GUI**: A lightweight graphical user interface for controlling various parameters in real-time.
6. **app.js**: My custom script where the main application logic is implemented.
These scripts collectively contribute to a rich and interactive experience in the 3D warehouse visualization.
Code Walk Through
With approximately 650 lines of JavaScript in the app.js file, the real magic unfolds.
I start by defining a function called setupThreeJs(). Every scene created with Three.js requires three essential objects: a scene, a camera, and a renderer. Additionally, incorporating controls is beneficial for navigating the 3D space smoothly.
Next, I create a background texture. I begin by generating a canvas element and then apply a 2D context to it. I design a gradient that transitions from a deep blue at the top to a lighter blue at the bottom. To enhance the visual quality, I convert the canvas into a THREE.CanvasTexture. Finally, I apply THREE.LinearFilter to both the minFilter and magFilter of the texture, ensuring a polished and smooth appearance.
function createBackgroundTexture() {
    const width = 512;
    const height = 512;
    const canvas = document.createElement('canvas');
    canvas.width = width;
    canvas.height = height;

    const context = canvas.getContext('2d');

    // Create gradient
    const gradient = context.createLinearGradient(0, 0, 0, height);
    gradient.addColorStop(0, '#000033'); // Deep blue (top)
    gradient.addColorStop(1, '#000080'); // Lighter blue (bottom)

    context.fillStyle = gradient;
    context.fillRect(0, 0, width, height);

    const texture = new THREE.CanvasTexture(canvas);
    texture.minFilter = THREE.LinearFilter;
    texture.magFilter = THREE.LinearFilter;
    return texture;
}
Lighting
Next, I devoted time to crafting dramatic lighting for the scene. Lighting is a fundamental element in any Three.js environment, as it can transform a basic 3D space into a captivating experience. Well-executed lighting and shadows not only enhance the visual appeal but also improve the overall user experience. Shadows contribute depth to the scene, while appropriate textures help objects appear more realistic, reducing that overly computer-generated look.
To begin, I integrated the background texture within the lighting function to ensure a cohesive aesthetic. I started by creating an AmbientLight object, which casts a soft, uniform glow throughout the scene. This foundational light source establishes a balanced base layer of illumination, ensuring that no area feels overly dark.
Next, I added a HemisphereLight, which mimics the natural light conditions one would find outdoors. This type of lighting provides a gradient effect, simulating the sky's brightness and creating a more dynamic atmosphere. It enhances the ambient light by casting softer shadows, adding a gentle touch of realism.
To introduce more directional lighting, I incorporated a DirectionalLight, representing sunlight. This light source is essential for creating defined shadows that give structure to the scene. By adjusting the properties of the sunlight, I could control the intensity and angle of the light, effectively modeling how natural light interacts with the various elements within the warehouse. I utilized the shadow property of the sunlight to generate realistic shadows, which help to anchor objects in their environment and add a layer of depth.
Additionally, I included a SpotLight to create focused beams of light that illuminate specific areas within the scene. This spotlight serves multiple purposes: it enhances the warehouse feel by mimicking the effect of overhead lighting found in industrial spaces and introduces dramatic highlights that accentuate key features. The spotlight also adds depth by casting sharper shadows, further enriching the 3D effect.
By thoughtfully combining these different light sources, I was able to create a visually compelling environment that not only looks realistic but also invites users to explore the intricacies of the warehouse. The interplay of ambient, hemisphere, directional, and spotlighting brings the scene to life, enhancing the overall immersive experience.
function addLighting() {
    // Create starry night gradient background
    const BackGroundTexture = createBackgroundTexture();
    scene.background = BackGroundTexture;

    // Ambient light with lower intensity
    const ambientLight = new THREE.AmbientLight(0x404040, 0.2); // Reduced intensity for a darker scene
    scene.add(ambientLight);

    // Hemisphere light with lower intensity
    const hemisphereLight = new THREE.HemisphereLight(0x333366, 0x111111, 0.3); // Dim sky and ground colors with lower intensity
    scene.add(hemisphereLight);

    // Sunlight simulation with reduced intensity
    const sunlight = new THREE.DirectionalLight(0xffffff, 1.0); // Lower intensity
    sunlight.position.set(50, 100, 50); // Position it to cast light from a high angle
    sunlight.castShadow = true;

    // Shadow properties for deeper shadows
    sunlight.shadow.camera.near = 1;
    sunlight.shadow.camera.far = 150;
    sunlight.shadow.camera.left = -100;
    sunlight.shadow.camera.right = 100;
    sunlight.shadow.camera.top = 100;
    sunlight.shadow.camera.bottom = -100;
    sunlight.shadow.mapSize.width = 8192; // Higher resolution shadow map
    sunlight.shadow.mapSize.height = 8192;
    sunlight.shadow.bias = -0.01; // Fine-tuned bias for better shadow quality

    scene.add(sunlight);

    // Point light with lower intensity
    const pointLight = new THREE.PointLight(0xffa500, 0.3, 50); // Reduced intensity for a subtler effect
    pointLight.position.set(-30, 40, 30); // Position it to highlight specific areas
    scene.add(pointLight);

    // Spot light with adjusted settings for more dramatic shadows
    const spotLight = new THREE.SpotLight(0xffffff, 0.5); // Reduced intensity
    spotLight.position.set(0, 50, 0); // Position it from above
    spotLight.angle = Math.PI / 6; // Narrower cone for more focused light
    spotLight.penumbra = 0.3; // Slightly softer edges
    spotLight.decay = 2; // How light fades over distance
    spotLight.distance = 100;
    spotLight.castShadow = true;

    // Shadow properties for the spot light
    spotLight.shadow.camera.near = 10;
    spotLight.shadow.camera.far = 150;
    spotLight.shadow.camera.fov = 40; // Field of view of the shadow camera
    spotLight.shadow.mapSize.width = 4096; // Shadow map size
    spotLight.shadow.mapSize.height = 4096;
    scene.add(spotLight);
}
Axes helper
I incorporated a function for an AxesHelper, which visualizes the x, y, and z axes in the scene. This feature is invaluable for positioning the shelves accurately, as it provides a clear reference for spatial orientation.
Next, I created a Raycaster object to enable click detection within the 3D environment. The raycaster identifies where light rays intersect with the mouse's position, allowing for interactive elements to respond to user input.
With these foundational components in place, I turned my attention to creating the shelves. I began by specifying their dimensions, ensuring they would fit seamlessly into the overall design of the warehouse.
// Shelf dimensions
const shelfHeight = 1;
const shelfDepth = 3;

// Define dimensions for shelves
const shelfDimensions = {
    regular: { width: 10, length: 1 },
    rotated: { width: 10, length: 1 },
    extraLong: { width: 50, length: 10 } // Custom width and length for extra-long shelves
};
Arrays
I employ a two-dimensional array to store all the part numbers for each shelf.
const part_numbers = [
    [1, 2, 3, 4, 5],    // Mid section Shelf 1
    [6, 7, 8, 9, 10],   // Mid section Shelf 2
    [11, 12, 13, 14, 15],  // Mid section Shelf 3
    [16, 17, 18, 19, 20],  // Mid section Shelf 4
    [1, 2, 3, 4, 5],    // Mid section Shelf 5
    [6, 7, 8, 9, 10],   // Mid section Shelf 6
    [11, 12, 13, 14, 15],  // Mid section Shelf 7
I then create an array to programmatically name the shelves. Additionally, I establish another array to hold the shelf sets.
// Arrays for different shelf set names
const midsectionNames = [];
const topSectionNames = [];
const fuelSectionNames = [];
const extraLongShelfNames = [
    "East_Shelf",
    "South Shelf",
    "heater_Rod_Shelf_South_Corner"
];
What If
I implemented an if statement for each shelf to ensure that each section is named consistently, with each name incremented by one for every shelf in the set. This systematic approach helps maintain organization within the shelving structure.
To achieve this, I created a loop that iterates through the shelves, generating names programmatically. Each generated name is then pushed into the corresponding array associated with the shelf name. This method not only streamlines the naming process but also allows for easy updates in the future if additional shelves need to be added.
Here’s an example of how I defined the midsection names:
// Midsection names
for (let i = 0; i < 7; i++) {
    midsectionNames.push(`Row_${i + 1}_Midsection`);
}
In this code snippet, the loop runs seven times, generating names such as Row_1_Midsection, Row_2_Midsection, and so forth, up to Row_7_Midsection. By following this naming convention, I ensure that each shelf section is uniquely identifiable while maintaining a clear and organized structure.
Shelves
Finally, I implemented the createShelves function, passing the positions array as an argument. This function is crucial for setting the spacing between individual shelves and the spacing between different shelf sets, ensuring a well-organized layout.
Within this function, I also created another function to establish the positions of each shelf. This function accepts several parameters: startX, startY, shelfType, shelfSetName, and setIndex. These parameters allow for flexibility in positioning each shelf accurately within the 3D space.
To maintain consistency in the design, I set a maximum height for each shelf set, ensuring that they align visually and structurally.
I also accounted for various orientations of the shelves—some face north to south, while others are oriented east to west. To handle this variation, I implemented conditional statements that adjust the rotation of the shelves accordingly. By using Math.PI / 2, I can easily modify the rotation angles, allowing for a more natural fit within the warehouse layout.
Next, I created the geometry for the shelves, defining their shapes and sizes. Once the geometry was established, I applied materials to enhance their visual appeal, giving them a realistic texture and color.
To optimize usability, I set the spacing between individual shelves, ensuring adequate room for accessing the parts stored on each shelf.
As part of the organization process, I attached part numbers to each shelf group by iterating through the associated data. This linkage not only helps in identifying parts quickly but also enhances the interactive experience.
To add clarity, I included labels for each shelf, making it easier for users to navigate the warehouse environment. Finally, I pushed these shelf labels into an array dedicated to storing shelf sets, creating a comprehensive reference that ties together the layout and functionality of the warehouse.
// Function to create shelves
function createShelves(positions) {
    const spaceBetweenSets = 2; // Reduced space between each set
    const spaceBetweenShelves = 5; // Space between each shelf in a set

    // Ensure we have enough part numbers arrays to assign to each shelf group
    if (positions.length > part_numbers.length) {
        console.error('Not enough part numbers arrays to assign to each shelf group.');
        return;
    }

    positions.forEach((position, i) => {
        const { startX, startZ, shelfType, shelfSetName, setIndex } = position;
        const shelfGroup = new THREE.Group();
        shelfGroup.position.set(startX, 0, startZ); // Set initial position
        const shelf_set_Height_Max = 5; // Set the max height of each shelf set

        for (let j = 0; j < shelf_set_Height_Max; j++) {
            let shelfWidth, shelfLength;

            if (shelfType === 'rotated') {
                shelfWidth = shelfDimensions.rotated.width;
                shelfLength = shelfDimensions.rotated.length;
                shelfGroup.rotation.y = Math.PI / 2; // Rotate shelf 90 degrees if it's rotated
            } else if (shelfType === 'extraLong') {
                shelfWidth = shelfDimensions.extraLong.width;
                shelfLength = shelfDimensions.extraLong.length;
            } else if (shelfType === 'extraLong_Rotated') {
                shelfWidth = shelfDimensions.extraLong.width;
                shelfLength = shelfDimensions.extraLong.length;
                shelfGroup.rotation.set(0, Math.PI / 2, 0);
            } else {
                shelfWidth = shelfDimensions.regular.width;
                shelfLength = shelfDimensions.regular.length;
            }

            const geometry = new THREE.BoxGeometry(shelfWidth, shelfHeight, shelfDepth);
            const material = new THREE.MeshStandardMaterial({ color: 0x8B4513, roughness: 0.7,
                metalness: 0.2 });
            const shelf = new THREE.Mesh(geometry, material);

            const startY = j * (shelfHeight + spaceBetweenShelves);
            shelf.position.set(0, startY, 0);

            // Assign a unique name to each shelf in the format 'shelf-setIndex-shelfIndex'
            shelf.name = `shelf-${setIndex}-${j}`;

            // Attach part numbers to shelf user data
            const partNumbers = (shelfGroup.userData.partNumbers || [])[j] || [];
            shelf.userData.partNumbers = partNumbers;

            shelfGroup.add(shelf);
        }

        // Create a label for the shelf set
        let label = `${shelfSetName}`;
        if (shelfType === 'rotated') {
            label += ' (Rotated)';
        }
        createShelfLabel(shelfGroup, label, shelf_set_Height_Max * (shelfHeight + spaceBetweenShelves) + 2);

        // Assign part numbers array to the group
        const partNumbersForGroup = part_numbers[i] || [];
        shelfGroup.userData.partNumbers = partNumbersForGroup;

        scene.add(shelfGroup);
        shelfSets.push(shelfGroup); // Add group to array
    });
}
What Is On The Shelf?
Next, I implemented a function to display the part numbers associated with each shelf. This function enhances user interactivity by allowing users to click on a shelf set and see relevant part numbers in a convenient 2D floating window next to the shelf.
To achieve this, I utilized an event listener that detects clicks on the shelf sets. When a user clicks on a shelf, the function retrieves the corresponding part numbers from the associated data structure. Once the part numbers are identified, they are displayed in a visually appealing floating window that appears adjacent to the selected shelf set.
This floating window serves multiple purposes: it provides immediate access to the part numbers, allowing users to quickly identify and reference items stored on that particular shelf. Additionally, the design of the floating window ensures that it does not obstruct the view of the 3D scene, maintaining the overall user experience.
To enhance usability, I also incorporated features such as the ability to close the floating window, ensuring that users can navigate seamlessly between different shelf sets without cluttering the interface. The function not only improves the overall functionality of the warehouse visualization but also adds an interactive layer that makes exploring the 3D environment more intuitive and engaging.
By providing clear visibility of part numbers in a dedicated space, users can efficiently manage their inventory and find the information they need without confusion. This thoughtful integration of interactive elements contributes to a more immersive experience in the warehouse environment.
// Function to create labels for shelf sets
function createShelfLabel(group, text, yPosition) {
    const loader = new THREE.FontLoader();
    loader.load('https://threejs.org/examples/fonts/helvetiker_regular.typeface.json', function (font) {
        const textGeometry = new THREE.TextGeometry(text, {
            font: font,
            size: 0.5,
            height: 0.1,
        });

        // Calculate text size for background plane
        const textSize = new THREE.Box3().setFromObject(new THREE.Mesh(textGeometry)).getSize(new THREE.Vector3());

        const backgroundGeometry = new THREE.PlaneGeometry(textSize.x + 0.2, textSize.y + 0.2); // Adjust padding
        const backgroundMaterial = new THREE.MeshBasicMaterial({ color: 0xffffff }); // White background
        const backgroundPlane = new THREE.Mesh(backgroundGeometry, backgroundMaterial);
        backgroundPlane.position.set(0, yPosition + 0.3, 0); // Position behind the text
        group.add(backgroundPlane);

        const textMaterial = new THREE.MeshStandardMaterial({ color: 0x000000 }); // Black text
        const textMesh = new THREE.Mesh(textGeometry, textMaterial);

        textMesh.position.set(-(textSize.x + 0.2) / 2, yPosition, 0); // Center text on background plane
        textMesh.rotation.set(0, 0, 0); // Ensure text faces the camera

        group.add(textMesh);
    });
}
Slice!
I employed the slice method to segment the arrays and map the part numbers to each shelf set effectively.
// Define the mapping of part numbers to each shelf set
const shelfSetPartNumbers = {
    0: part_numbers.slice(0, 6), // Midsection Shelves
    1: part_numbers.slice(7, 11), // Top Section Shelves
    2: part_numbers.slice(12, 16), // Fuel Sections Shelves
    3: part_numbers.slice(16) // Additional Sections (e.g., Extra-long shelves)
};
Push!
Afterward, I added the positions for each shelf set to an array, categorizing them according to their type and shelfSetName.
// shelf types extraLong_Rotated, regular, rotated, extraLong
// Create positions for Midsections
for (let i = 0; i < midsectionNames.length; i++) {
    positions.push({ startX: -30, startZ: -60 + 10 * i, shelfType: 'regular', shelfSetName: midsectionNames[i], setIndex: 0 });
}

// Create positions for Top Sections
for (let i = 0; i < topSectionNames.length; i++) {
    positions.push({ startX: -10, startZ: -60 + 10 * i, shelfType: 'regular', shelfSetName: topSectionNames[i], setIndex: 1 });
}

// Create positions for Fuel Sections
for (let i = 0; i < fuelSectionNames.length; i++) {
    positions.push({ startX: -50, startZ: 50 + 10 * i, shelfType: 'regular', shelfSetName: fuelSectionNames[i], setIndex: 2 });
}

// create positions for extra long shelves  shelf types extraLong_Rotated, regular, rotated, extraLong
positions.push({ startX: -80, startZ: 50, shelfType: 'extraLong_Rotated', shelfSetName: extraLongShelfNames [0], setIndex: 3 });

// create positions for extra long shelves  shelf types extraLong_Rotated, regular, rotated, extraLong
//positions.push({ startX: 0, startZ: -50, shelfType: 'extraLong', shelfSetName: extraLongShelfNames [1], setIndex: 3 });

// create positions for extra long shelves  shelf types extraLong_Rotated, regular, rotated, extraLong
positions.push({ startX: 0, startZ: -90, shelfType: 'extraLong', shelfSetName: extraLongShelfNames [2], setIndex: 3 });
Front Desk
I also created a desk within the scene, which serves as a reference point for orientation—specifically indicating the north direction. This addition is crucial for organizing the shelves in relation to a fixed position, as it provides a clear and consistent framework for layout.
Having a designated point of reference helps me align the shelves systematically, ensuring that they are positioned logically within the warehouse environment. This spatial organization not only enhances the overall aesthetics of the scene but also improves navigability. Users can easily determine the location of various shelf sets based on their proximity to the desk.
By establishing the desk as a northward anchor, I can maintain a coherent arrangement of the shelving units, allowing for a more intuitive understanding of the space. This thoughtful approach to organization fosters a user-friendly environment, making it easier to locate specific parts or shelves while navigating through the 3D scene.
// Function to create the desk
function createDesk() {
    // Desk dimensions
    const deskWidth = 20;
    const deskHeight = 0.5;
    const deskDepth = 10;
    const legHeight = 7;
    const legThickness = 0.5;

    // Desk geometry and material
    const deskGeometry = new THREE.BoxGeometry(deskWidth, deskHeight, deskDepth);
    const deskMaterial = new THREE.MeshStandardMaterial({ color: 0x8B4513 }); // Brown color for the desk
    const desk = new THREE.Mesh(deskGeometry, deskMaterial);

    // Set the desk's position and rotation
    const deskPosition = new THREE.Vector3(80, legHeight + deskHeight / 2, 0);
    const deskRotation = Math.PI / 2; // Example rotation of 90 degrees (π/2 radians)
    desk.position.copy(deskPosition);
    desk.rotation.y = deskRotation;

    // Leg geometry and material
    const legGeometry = new THREE.BoxGeometry(legThickness, legHeight, legThickness);
    const legMaterial = new THREE.MeshStandardMaterial({ color: 0x4B3B2A }); // Darker brown for the legs

    // Create four legs and position them relative to the rotated desk
    const createLeg = (xOffset, zOffset) => {
        const leg = new THREE.Mesh(legGeometry, legMaterial);

        // Calculate leg position relative to desk center
        const legOffset = new THREE.Vector3(xOffset, -deskHeight / 2 - legHeight / 2, zOffset);
        legOffset.applyMatrix4(new THREE.Matrix4().makeRotationY(deskRotation)); // Apply rotation
        legOffset.add(deskPosition); // Apply position

        leg.position.copy(legOffset);
        return leg;
    };

    // Position of legs relative to the desk's center
    const leg1 = createLeg(-deskWidth / 2 + legThickness / 2, -deskDepth / 2 + legThickness / 2);
    const leg2 = createLeg(deskWidth / 2 - legThickness / 2, -deskDepth / 2 + legThickness / 2);
    const leg3 = createLeg(-deskWidth / 2 + legThickness / 2, deskDepth / 2 - legThickness / 2);
    const leg4 = createLeg(deskWidth / 2 - legThickness / 2, deskDepth / 2 - legThickness / 2);

    // Add desk and legs to the scene
    scene.add(desk);
    scene.add(leg1);
    scene.add(leg2);
    scene.add(leg3);
    scene.add(leg4);
}
Search Bar
Naturally, I had to create a search bar. The search bar may be the greatest invention since the wheel.
To enhance user convenience, I implemented a search bar that streamlines the process of locating specific part numbers across all shelves. This feature allows users to effortlessly input a part number and quickly find its corresponding location within the warehouse.
Once a user enters a part number into the search bar, the application immediately searches through the inventory, identifying any matches across the various shelves. When a match is found, the shelf containing that part number is dynamically highlighted by changing its color to red. This visual cue not only draws attention to the relevant shelf but also makes it easy for users to pinpoint the exact location of the item they are seeking.
The search bar is designed with user-friendliness in mind. It offers an intuitive interface, enabling users to navigate the warehouse with minimal effort. As users type, the search function quickly responds, providing real-time feedback and ensuring that they can locate parts efficiently. This is particularly beneficial in a large inventory system where manually searching through each shelf can be time-consuming and cumbersome.
By integrating this search functionality, I aimed to create a more seamless and enjoyable user experience. Users can now focus on managing their inventory effectively without getting bogged down by the complexity of the 3D environment. The combination of immediate visual feedback and intuitive design empowers users to quickly access the information they need, ultimately enhancing their productivity within the warehouse setting.
// Function to search part numbers
function searchPartNumber() {
    //select the html elements
    const searchInput = document.getElementById('searchInput');
    const searchResult = document.getElementById('searchResult');
    const shelfNameDiv = document.getElementById('shelfName');

    //search the part_number arrays for the input value
    const partNumber = searchInput.value.trim();

    // Clear previous highlights and shelf name
    shelfSets.forEach(group => {
        group.traverse(child => {
            if (child instanceof THREE.Mesh) {
                child.material.color.set('#8B4513'); // Reset shelf color to default
            }
        });
    });
    shelfNameDiv.innerHTML = '';

    if (partNumber === '') {
        searchResult.innerHTML = 'Please enter a part number.';
        return;
    }

    // Search through part_numbers array
    let found = false;
    for (const [index, group] of part_numbers.entries()) {
        if (group.includes(Number(partNumber))) {

            // Highlight the shelf group
            const shelfGroup = shelfSets[index];
            shelfGroup.traverse(child => {
                if (child instanceof THREE.Mesh) {
                    child.material.color.set('#ff0000'); // Highlight the shelf
                }
            });
            // display search result with shelf name

            searchResult.innerHTML = `Part number ${partNumber} is on ${shelfSetNames[index]}.`;

            found = true;
            break;
        }
    }

    if (!found) {
        searchResult.innerHTML = `Part number ${partNumber} not found.`;
    }
}
Listen Up
Set up event listeners to manage both click events and keypress actions.
// Event listener for the search button
document.getElementById('searchButton').addEventListener('click', searchPartNumber);

// Optionally, handle "Enter" key press in the input box
document.getElementById('searchInput').addEventListener('keypress', function(event) {
    if (event.key === 'Enter') {
        searchPartNumber();
    }
});

// Event listener for the search button
document.getElementById('searchButton').addEventListener('click', searchPartNumber);

// Optionally, handle "Enter" key press in the input box
document.getElementById('searchInput').addEventListener('keypress', function(event) {
    if (event.key === 'Enter') {
        searchPartNumber();
    }
});
Then I create the floor. All the shelves will rest on the floor of the digital warehouse.
// Function to create the floor
function createFloor() {
    // Floor plane
    const floorGeometry = new THREE.PlaneGeometry(200, 200); // Large plane
    const floorMaterial = new THREE.MeshStandardMaterial({ color: 0xffffff }); // White floor
    const floor = new THREE.Mesh(floorGeometry, floorMaterial);
    floor.rotation.x = -Math.PI / 2; // Rotate to be horizontal
    floor.position.y = -0.1; // Position slightly below origin to ensure it's visible
    scene.add(floor);

    // Add grid helper
    const gridHelper = new THREE.GridHelper(200, 20); // Size and divisions of the grid
    gridHelper.position.y = -0.1; // Position same as floor to overlay
    scene.add(gridHelper);
}
Render the three.js scene
I implemented a function to render the scene, which is essential when using Three.js. This process requires a continuous loop that prompts the renderer to redraw the scene every time the screen refreshes, typically at a rate of 60 frames per second on standard displays.
// Animation loop
function animate() {
    requestAnimationFrame(animate);

    controls.update();
    renderer.render(scene, camera);
}
Next, I developed a function to convert 3D coordinates into 2D projections. This ensures that the part numbers are oriented to face the user, effectively bringing them outside the confines of the computer monitor and into the digital warehouse I’ve created.
// Converts 3D coordinates to 2D
function toScreenPosition(obj, camera, renderer) {
    const vector = new THREE.Vector3();
    const widthHalf = 0.5 * renderer.domElement.width;
    const heightHalf = 0.5 * renderer.domElement.height;

    obj.updateMatrixWorld();
    vector.setFromMatrixPosition(obj.matrixWorld);
    vector.project(camera);

    vector.x = (vector.x * widthHalf) + widthHalf;
    vector.y = -(vector.y * heightHalf) + heightHalf;

    return {
        x: vector.x,
        y: vector.y
    };
}
I then implemented a function to manage mouse clicks, which includes converting the cursor coordinates to window coordinates. To ensure alignment between the computer's 3D space and the user's perspective, I developed a method to transform 3D coordinates into 2D projections. This way, both the system and the user can accurately identify what the mouse is clicking on.
function onMouseClick(event) {
    event.preventDefault();

    // Convert mouse coordinates to normalized device coordinates (NDC)
    mouse.x = (event.clientX / window.innerWidth) * 2 - 1;
    mouse.y = -(event.clientY / window.innerHeight) * 2 + 1;

    // Update raycaster with the mouse coordinates
    raycaster.setFromCamera(mouse, camera);

    // Check for intersections with objects in the scene
    // this finds the coordinates of the intersection of the raycast and mouse click

    const intersects = raycaster.intersectObjects(scene.children, true);

    if (intersects.length > 0) {
        const clickedObject = intersects[0].object;

        // Check if the clicked object is a shelf
        if (clickedObject.name.startsWith('shelf-')) {
            // Retrieve the shelfGroup that contains the clicked shelf
            let parentGroup = clickedObject.parent;
            while (parentGroup && !(parentGroup instanceof THREE.Group)) {
                parentGroup = parentGroup.parent;
            }

            if (parentGroup) {
                // Retrieve part numbers for the entire group based on the group user data
                const partNumbersForGroup = parentGroup.userData.partNumbers || [];

                // Flatten the part numbers for the entire group into a single list
                const allPartNumbers = partNumbersForGroup.flat();

                // Function to format part numbers with 6 numbers per line
                function formatPartNumbers(numbers, perLine) {
                    let formatted = '';
                    for (let i = 0; i < numbers.length; i++) {
                        if (i > 0 && i % perLine === 0) {
                            formatted += '
';
                        }
                        formatted += numbers[i] + ' ';
                    }
                    return formatted.trim(); // Remove trailing space
                }

                // Format part numbers with 6 per line
                const formattedPartNumbers = formatPartNumbers(allPartNumbers, 6);

                // Determine the shelf set name based on the index
                const setIndex = shelfSets.indexOf(parentGroup);
                const shelfSetName = shelfSetNames[setIndex] || 'Unknown Shelf Set';

                // Update infoDiv content with formatted part numbers and shelf set name
                infoDiv.innerHTML = `${shelfSetName}
${formattedPartNumbers}`;
                infoDiv.style.display = 'block';

                // Position infoDiv
                const { x, y } = toScreenPosition(clickedObject, camera, renderer);
                infoDiv.style.left = `${x}px`;
                infoDiv.style.top = `${y}px`;
                infoDiv.style.transform = 'translate(-50%, -100%)'; // Center the info box above the shelf
            }
        }
    }
}
Just The Tip
I also integrated a tooltip feature that appears when the mouse hovers over a shelf. This tooltip provides a list of the part numbers located on that shelf, enhancing user interaction and accessibility to information.
//when mouse hovers above shelf, tooltip is engaged

let tooltip = document.createElement('div');
tooltip.style.position = 'absolute';
tooltip.style.background = 'rgba(0,0,0,0.7)';
tooltip.style.color = 'white';
tooltip.style.padding = '5px';
tooltip.style.borderRadius = '5px';
tooltip.style.display = 'none';
document.body.appendChild(tooltip);
I added a function that listens for mouse movement and responds to events accordingly. This function detects where the light rays intersect with objects in the scene, identifies whether the intersected object is a shelf, and displays the tooltip when the mouse hovers over it.
function onMouseMove(event) {
    event.preventDefault();

    mouse.x = (event.clientX / window.innerWidth) * 2 - 1;
    mouse.y = -(event.clientY / window.innerHeight) * 2 + 1;

    raycaster.setFromCamera(mouse, camera);

    const intersects = raycaster.intersectObjects(scene.children, true);

    if (intersects.length > 0) {
        const intersectedObject = intersects[0].object;

        if (intersectedObject.name.startsWith('shelf-')) {
            tooltip.style.display = 'block';

            // Determine the shelf set name based on the index
            let parentGroup = intersectedObject.parent;
            while (parentGroup && !(parentGroup instanceof THREE.Group)) {
                parentGroup = parentGroup.parent;
            }

            const setIndex = shelfSets.indexOf(parentGroup);
            const shelfSetName = shelfSetNames[setIndex] || 'Unknown Shelf Set';
            //tooltip is created when mouse hovers over shelf

            tooltip.innerText = `Shelf: ${shelfSetName}`;
            const { x, y } = toScreenPosition(intersectedObject, camera, renderer);
            tooltip.style.left = `${x}px`;
            tooltip.style.top = `${y}px`;
        } else {
            tooltip.style.display = 'none';
        }
    } else {
        tooltip.style.display = 'none';
    }
}

window.addEventListener('mousemove', onMouseMove, false);
To integrate all these elements, I implemented a function that automatically handles window resizing. I also set the initial camera position to align with the user's viewpoint, ensuring the camera faces the same direction as the user's line of sight. Finally, I invoked the animate function to initiate the animation loop, effectively bringing the Three.js scene to life.
function onWindowResize() {
    camera.aspect = window.innerWidth / window.innerHeight;
    camera.updateProjectionMatrix();
    renderer.setSize(window.innerWidth, window.innerHeight);
}
window.addEventListener('resize', onWindowResize, false);

// Initial camera position
camera.position.set(0, 20, 100);

// Start the animation loop
animate();
Final Thoughts
This serves as a brief demonstration of the incredible possibilities offered by the Three.js library, though there is ample room for enhancement. I envision adding objects to the shelves that visually represent each part, which could be quite complex given the thousands of different items stored in the warehouse, each identified by a unique number.
Additionally, I would like to implement features that allow users to easily edit, add, or delete part numbers, as well as modify and relocate shelves. Improving the lighting and textures would also contribute to a more realistic atmosphere within the scene. Furthermore, enhancing user interaction with the environment could greatly enrich the overall experience.